How eCom works in the store
💡 All new integrations: Use the ePayment API.
📚 Existing eCom API users: See the eCom to ePayment migration guide for step-by-step migration instructions.
Stores can allow customers to pay easily and quickly from their own phone, without the need to touch the terminal. This page shows an example of how you can offer contactless payment to your customers by integrating Vipps in your POS system.
It is also possible to use our simpler solution, Open amount, but then the amount must be entered manually at checkout, and there will be some follow-up with accounting and settlement.
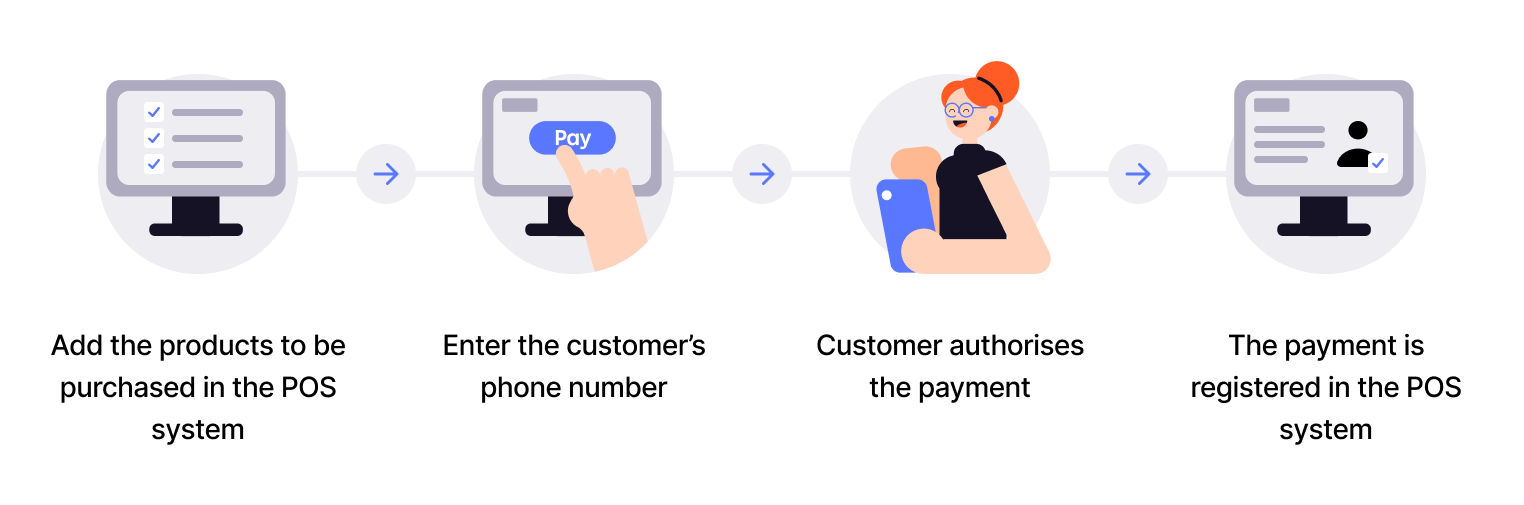
Flow diagram: 4-step in-store ePayment process. (1) Add the products to be purchased in the POS system. (2) Enter the customer's phone number. (3) Customer authorizes the payment. (4) The payment is registered in the POS system.
1. Add products to sell
Add the products that the customer wants to buy in the POS system.
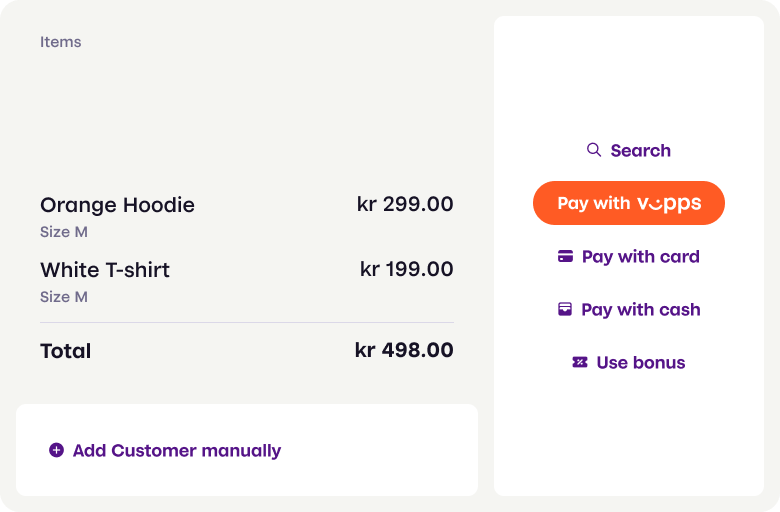
Screenshot: POS system showing two items on the left, and payment method options including a highlighted "Pay with Vipps" button on the right.
When the customer is ready to pay, choose Pay with Vipps.
2. Enter the customer's phone number
Enter the customer's phone number.
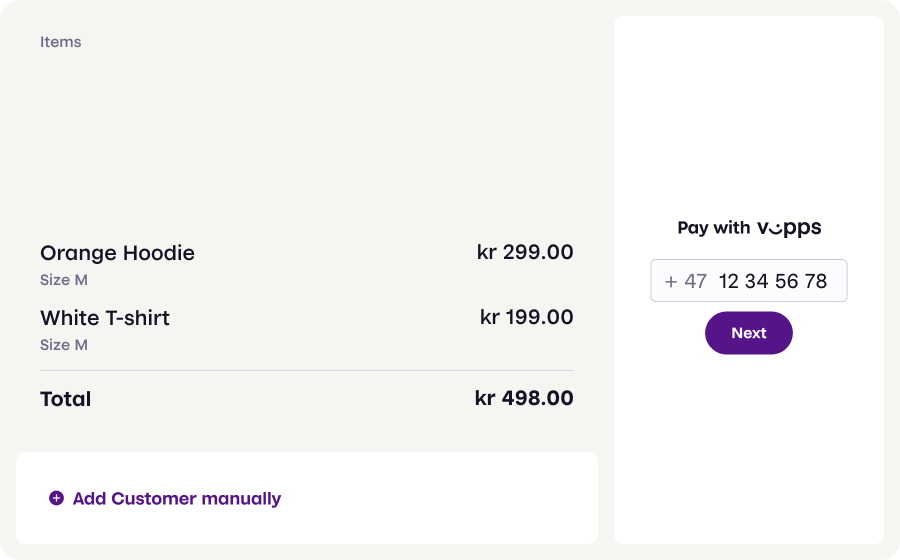
Screenshot: POS system showing order items on the left and a "Pay with Vipps" phone number input field with a Next button on the right.
3. The customer confirms payment in Vipps
The customer confirms the payment in Vipps on their phone.
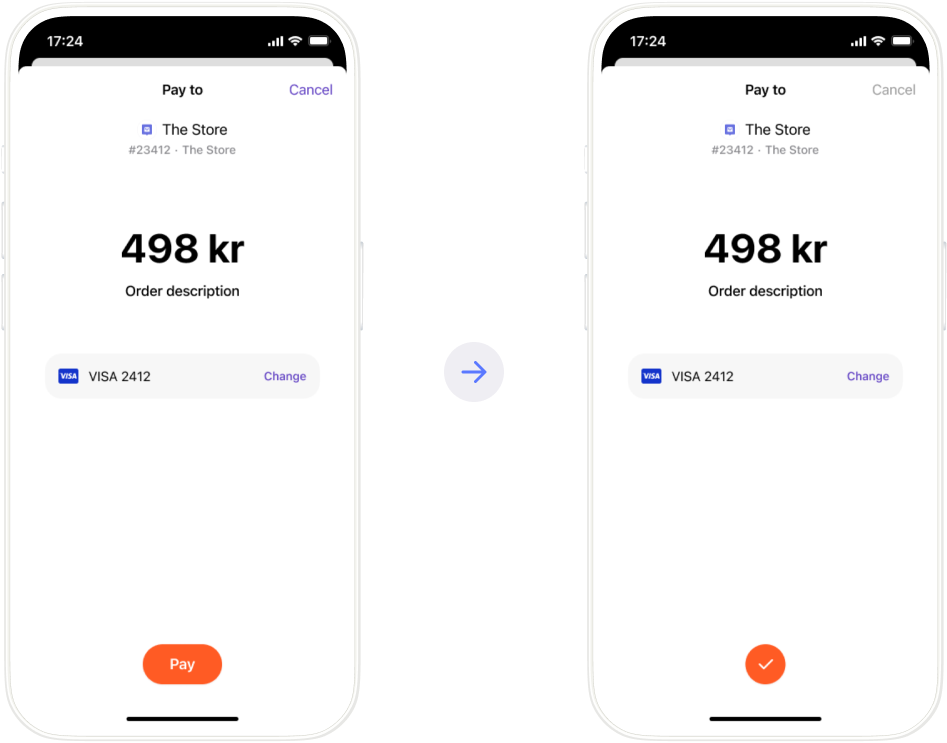
Screenshots: Two Vipps app screens side by side. Left: payment screen with a Pay button. Right: the same screen after authorization with a green checkmark confirming success.
4. Payment is registered
The payment is registered in the POS system.

Screenshot: POS system showing order items on the left and a large green checkmark with "Payment completed" on the right.
Great! Now you know how the Vipps in-store payment process works.
Read all the technical details in the eCom API Guide