Payment Module user guide
This is the guide for installing and configuring Vipps/MobilePay Payment Module for Adobe Commerce (the Payment module).
Prerequisites
- Adobe Commerce installed (Adobe Commerce 2.4.0) or later.
- SSL must be installed on your site and active on your checkout pages.
- You must have a Vipps MobilePay merchant account in the country (see Apply for services).
- As with all Adobe Commerce extensions, it is highly recommended backing up your site before installation and to install and test on a staging environment prior to production deployments.
- Supported protocols HTTP1/HTTP1.1
- Adobe Commerce relies on the Zend Framework, which does not support HTTP/2.
- HTTP/1.1 must therefore be "forced", typically by using CPanel or similar.
Installation
Installation via Composer
- Navigate to your Adobe Commerce root directory.
- Enter command:
composer require vipps/module-payment - Enter command:
php bin/magento module:enable Vipps_Payment - Enter command:
php bin/magento setup:upgrade - Put your Adobe Commerce in production mode, if required.
Configuration
The Payment module can be easily configured to meet business expectations of your web store. This section will show you how to configure the extension via the Adobe Commerce Admin Panel.
- From Adobe Commerce, navigate to Stores > Configuration > Sales > Payment Methods section.
- On the Payments Methods page, the Vipps MobilePay method should be listed together with other installed payment methods in a system.
- By clicking the Configure button, all configuration module settings will be shown.
- Once you have finished the configuration, click Close and Save button.
- Clear Adobe Commerce Cache.
Add a separate connection for Vipps MobilePay resources
These settings are required to prevent the loss of profiles when Adobe Commerce reverts invoice or refund transactions.
-
Duplicate the
default_connectioninapp/etc/env.phpand name it 'vipps'.It should look like:
'vipps' => ['host' => 'your_DB_host','dbname' => 'your_DB_name','username' => 'your_user','password' => 'your_password','model' => 'mysql4','engine' => 'innodb','initStatements' => 'SET NAMES utf8;','active' => '1',], -
Then, add the following configuration to the
resourcearray in the same file:'vipps' => ['connection' => 'vipps',],
Settings
The module configuration is divided by sections. It helps to quickly find and manage settings of each module feature:
Ensure that you check all configuration settings before using the module. Pay special attention to the Basic settings section.
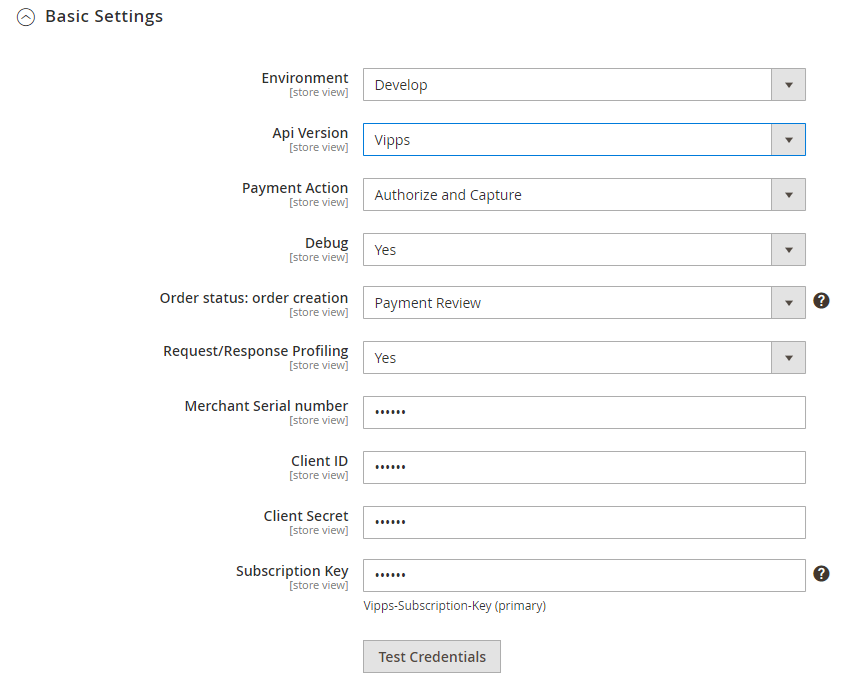
Basic settings
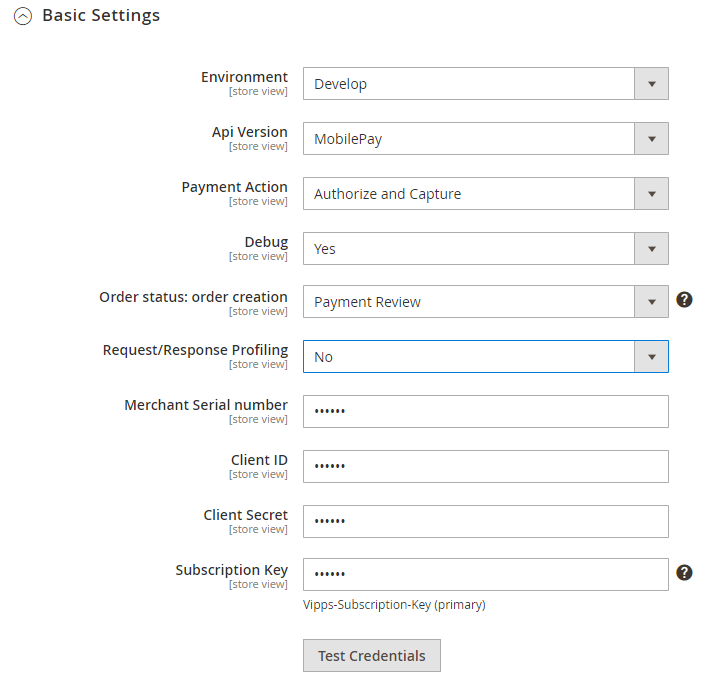
Basic settings include:
- Environment - Vipps MobilePay API mode, which can be Production or Develop.
- Payment Action - Authorize (process authorization transaction; funds are blocked on customer account, but not withdrawn) or Capture (withdraw previously authorized amount).
- Debug - Log all actions with this Payment module into
{project_root}/var/log/vipps_debug.logfile (not recommended in production mode). - Order Status - Default order status before redirecting back to Adobe Commerce. Can be Pending or Payment Review.
- Request/Response Profiling - Log all requests/responses to Vipps MobilePay API into
vipps_profilingtable. - Merchant Serial Number - ID number for the sales unit.
- Client ID - Client ID for the sales unit (the "username").
- Client Secret - Client secret for the merchant (the "password").
- Subscription Key - Subscription key for the API product.
For help finding the values for Merchant Serial Number, Client ID, Client Secret, and Subscription Key, see API keys.
Checkout settings
The Vipps MobilePay payment will be unavailable when disallowed shipping methods are selected on checkout. These methods are also unavailable on the Express page.

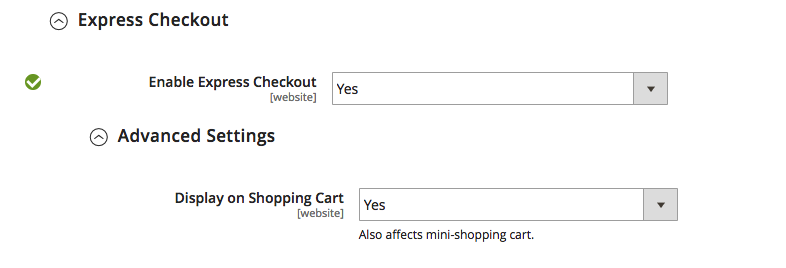
Express settings
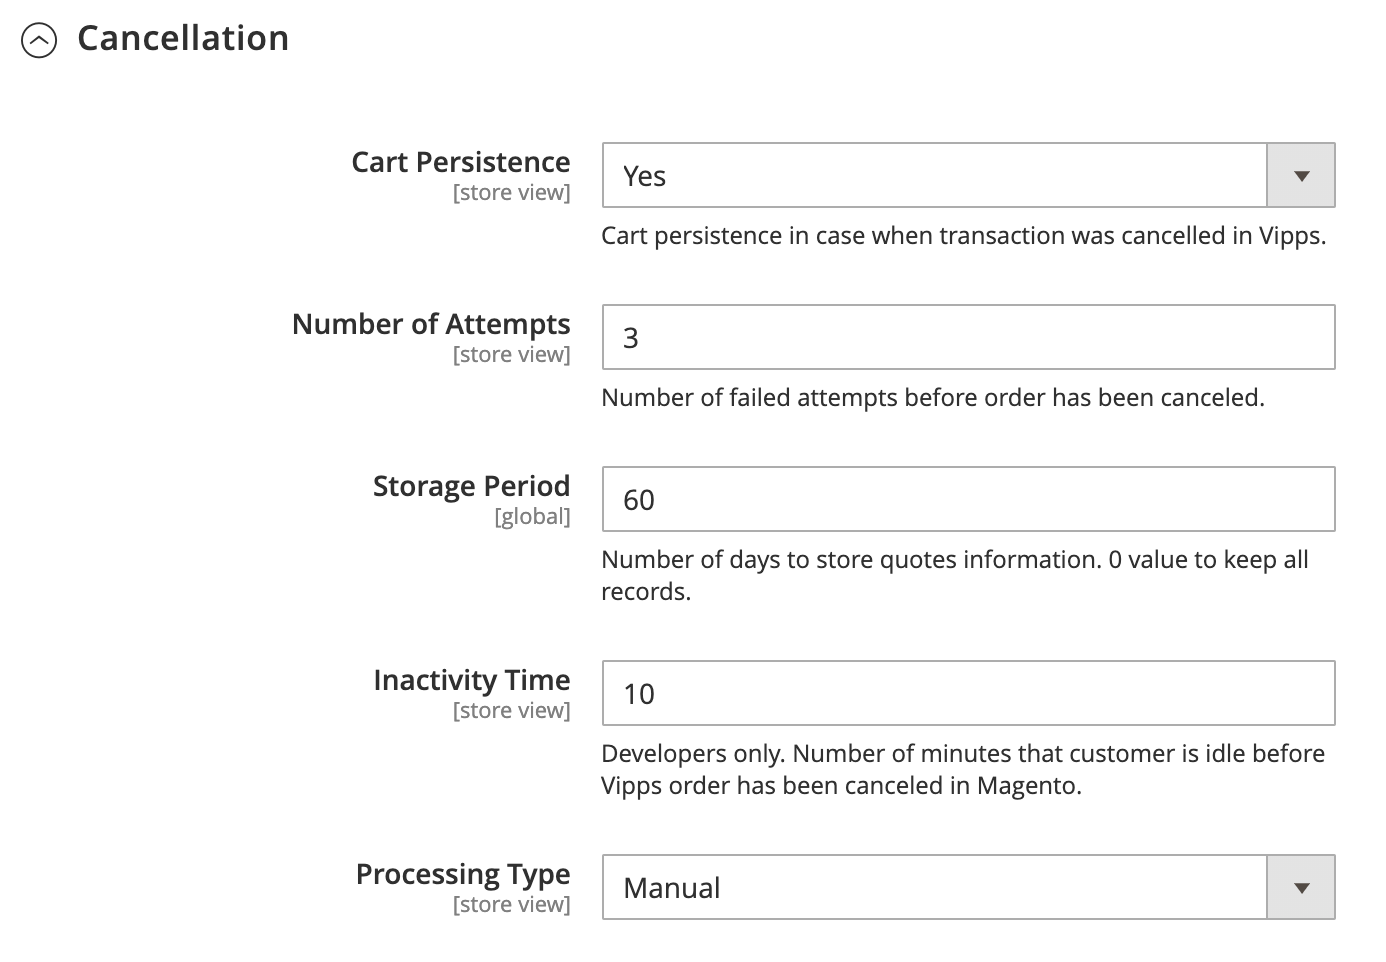
Cancellation settings
The Cancellation settings include:
- Cart Persistence - If set to Yes and client cancels an order on the Vipps MobilePay side, the cart will still contain the recently added products.
- Number of Attempts - The number of failed order placement attempts allowed before the order will be cancelled.
- Storage Period - The number of days to store the quote information. Use
0to keep all records. - Inactivity Time - (Developers only) The number of minutes that customer is idle before the Vipps MobilePay order will be cancelled in Adobe Commerce.
- Processing Type - Deprecated setting that will be removed in future releases. (Should be set to "Automatic").
Order processing
Please refer to the Adobe Commerce official documentation to learn more about order processing and order management.
Quote processing flow
The quote is an offer. The user accepts the offer when checking out, and it is converted to an order.
When the payment has been initiated (customer redirected to Vipps MobilePay), Adobe Commerce creates a new record on the Quote Monitoring page and starts tracking a Vipps MobilePay order. To do that, Adobe Commerce has a cron job that runs by schedule/each 10 minutes.
You can find this page under the System > Vipps Payment > Quote Processing. For the cancellation configuration settings, see Store > Sales > Payment Methods > Vipps MobilePay > Cancellation.
-
When a payment is initiated, a new record is created on the Quote Monitoring page with status
New.- For a "Regular Payment", the order is immediately placed on the Adobe Commerce side with status new, pending, or payment review, depending on the configuration.
-
Adobe Commerce regularly (by
cron) polls Vipps MobilePay for orders that need processing. -
When an order is accepted on Vipps MobilePay side, Adobe Commerce tries to place the order and marks a record as
Placed- For a "Regular Payment", the Adobe Commerce order is moved to status
Processing.
- For a "Regular Payment", the Adobe Commerce order is moved to status
-
When an order is cancelled on the Vipps MobilePay side, Adobe Commerce marks such record as
Cancelled.- The order is cancelled on the Adobe Commerce side, if it was previously placed.
-
If an order has not been accepted on the Vipps MobilePay side within some period of time, it is marked as expired. Adobe Commerce subsequently marks the order as
Expired.- The order is cancelled on the Adobe Commerce side, if it was previously placed.
-
If an order has not been yet been accepted on the Vipps MobilePay side and has not yet expired, Adobe Commerce marks it as
Processing. An appropriate message is added on Record details page. -
If an order has been accepted on the Vipps MobilePay side, but an error has occurred during order placement on Adobe Commerce side, such a record is marked as
Processing. An appropriate message is added on record details page. -
Adobe Commerce will attempt to process a record three times. After it fails three times, the record is marked as
Place Failed. -
It is possible to specify that Adobe Commerce must cancel a Vipps MobilePay order automatically when an appropriate Adobe Commerce quote has failed, so that client's money is released. See Store > Sales > Payment Methods > Vipps MobilePay > Cancellation.
-
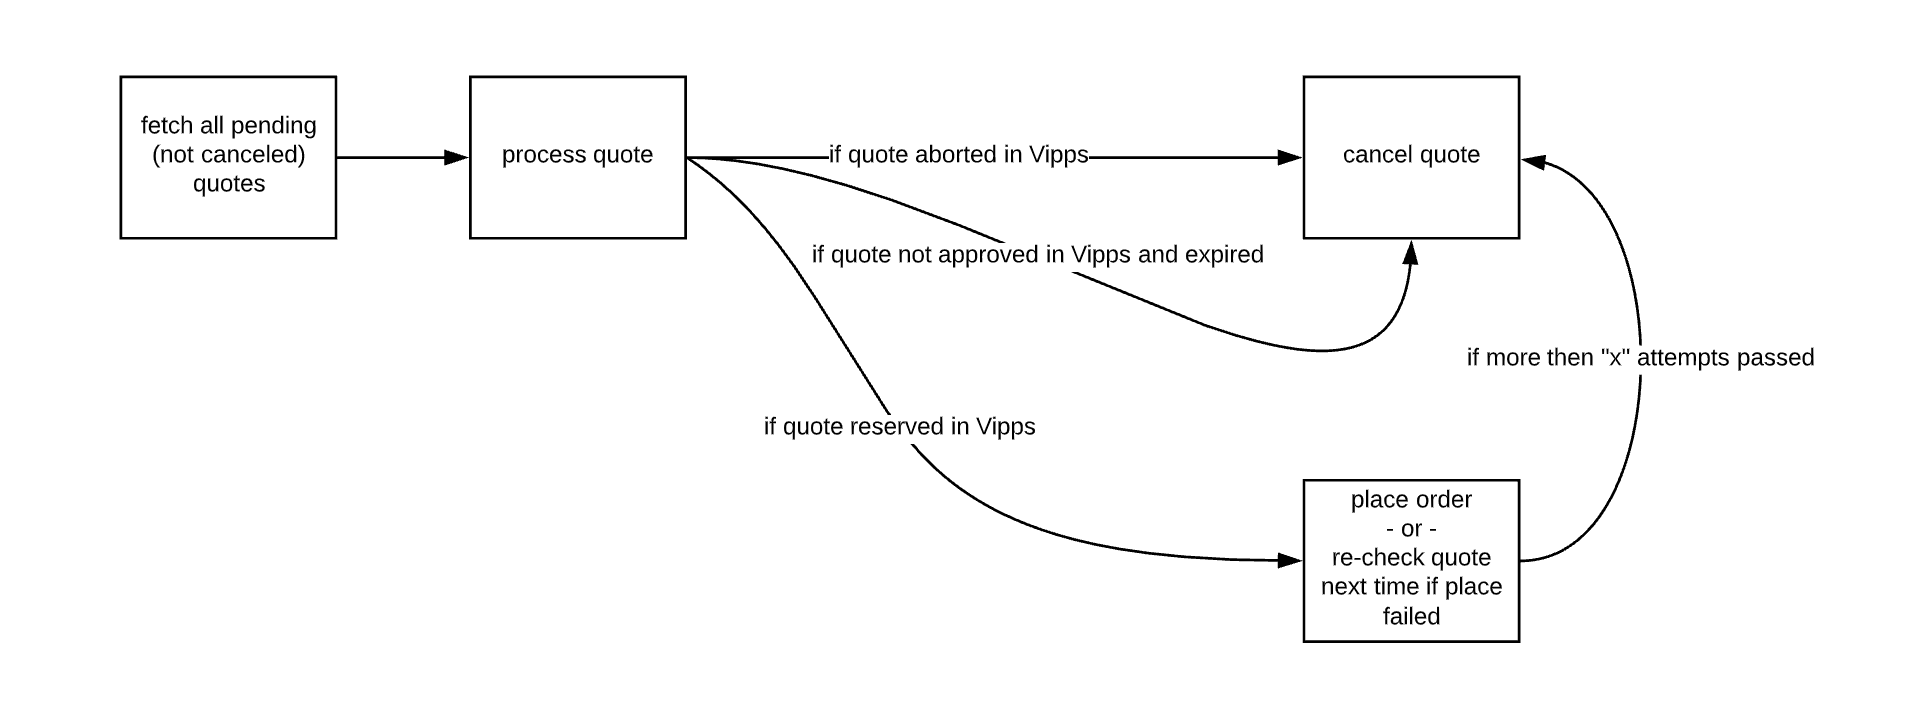
If it is specified that Adobe Commerce must cancel all failed quotes, then Adobe Commerce fetches all records marked as
Place Failed, cancels them, and marks them asCancelled.
Here is a diagram of the process:
Quote Monitoring tool
Quote Monitoring simplifies detection of failed order placement and identifies the root causes of failures.
The monitoring tool is located under System > Vipps Payment > Quote Monitoring. This page displays all orders that were attempted to be placed. Each record in the list provides detailed information about order creation flow: current status, list of attempts, each attempt results.
Monitoring quote statuses include:
- New - Payment is initiated on the Vipps MobilePay side.
- Processing - Adobe Commerce has started processing for initiated payment.
- Placed - The order has been placed.
- Expired - The customer has not approved payment for some time.
- Placement Failed - All attempts were unsuccessful.
- Canceled - The payment has been cancelled. Cancellation can be initiated by the customer in Vipps MobilePay or manually/automatically by Adobe Commerce for Quotes in Placement Failed status.
- Cancel Failed - The payment could not be cancelled. Records in this status require admin/developer interaction.
Enable debug mode / requests profiling
If you have experienced any issue with Vipps MobilePay, try to enable Request Profiling and Debug features in the payment configuration area: Stores > Configuration > Sales > Payment Methods > Vipps MobilePay.
After that, all information related to the Payment module will be stored into two files:
{project_root}/var/log/vipps_exception.log{project_root}/var/log/vipps_debug.log
Requests Profiling is a page in the Adobe Commerce that helps you to track a communication between Vipps MobilePay and Adobe Commerce. You can find the page under System > Vipps.
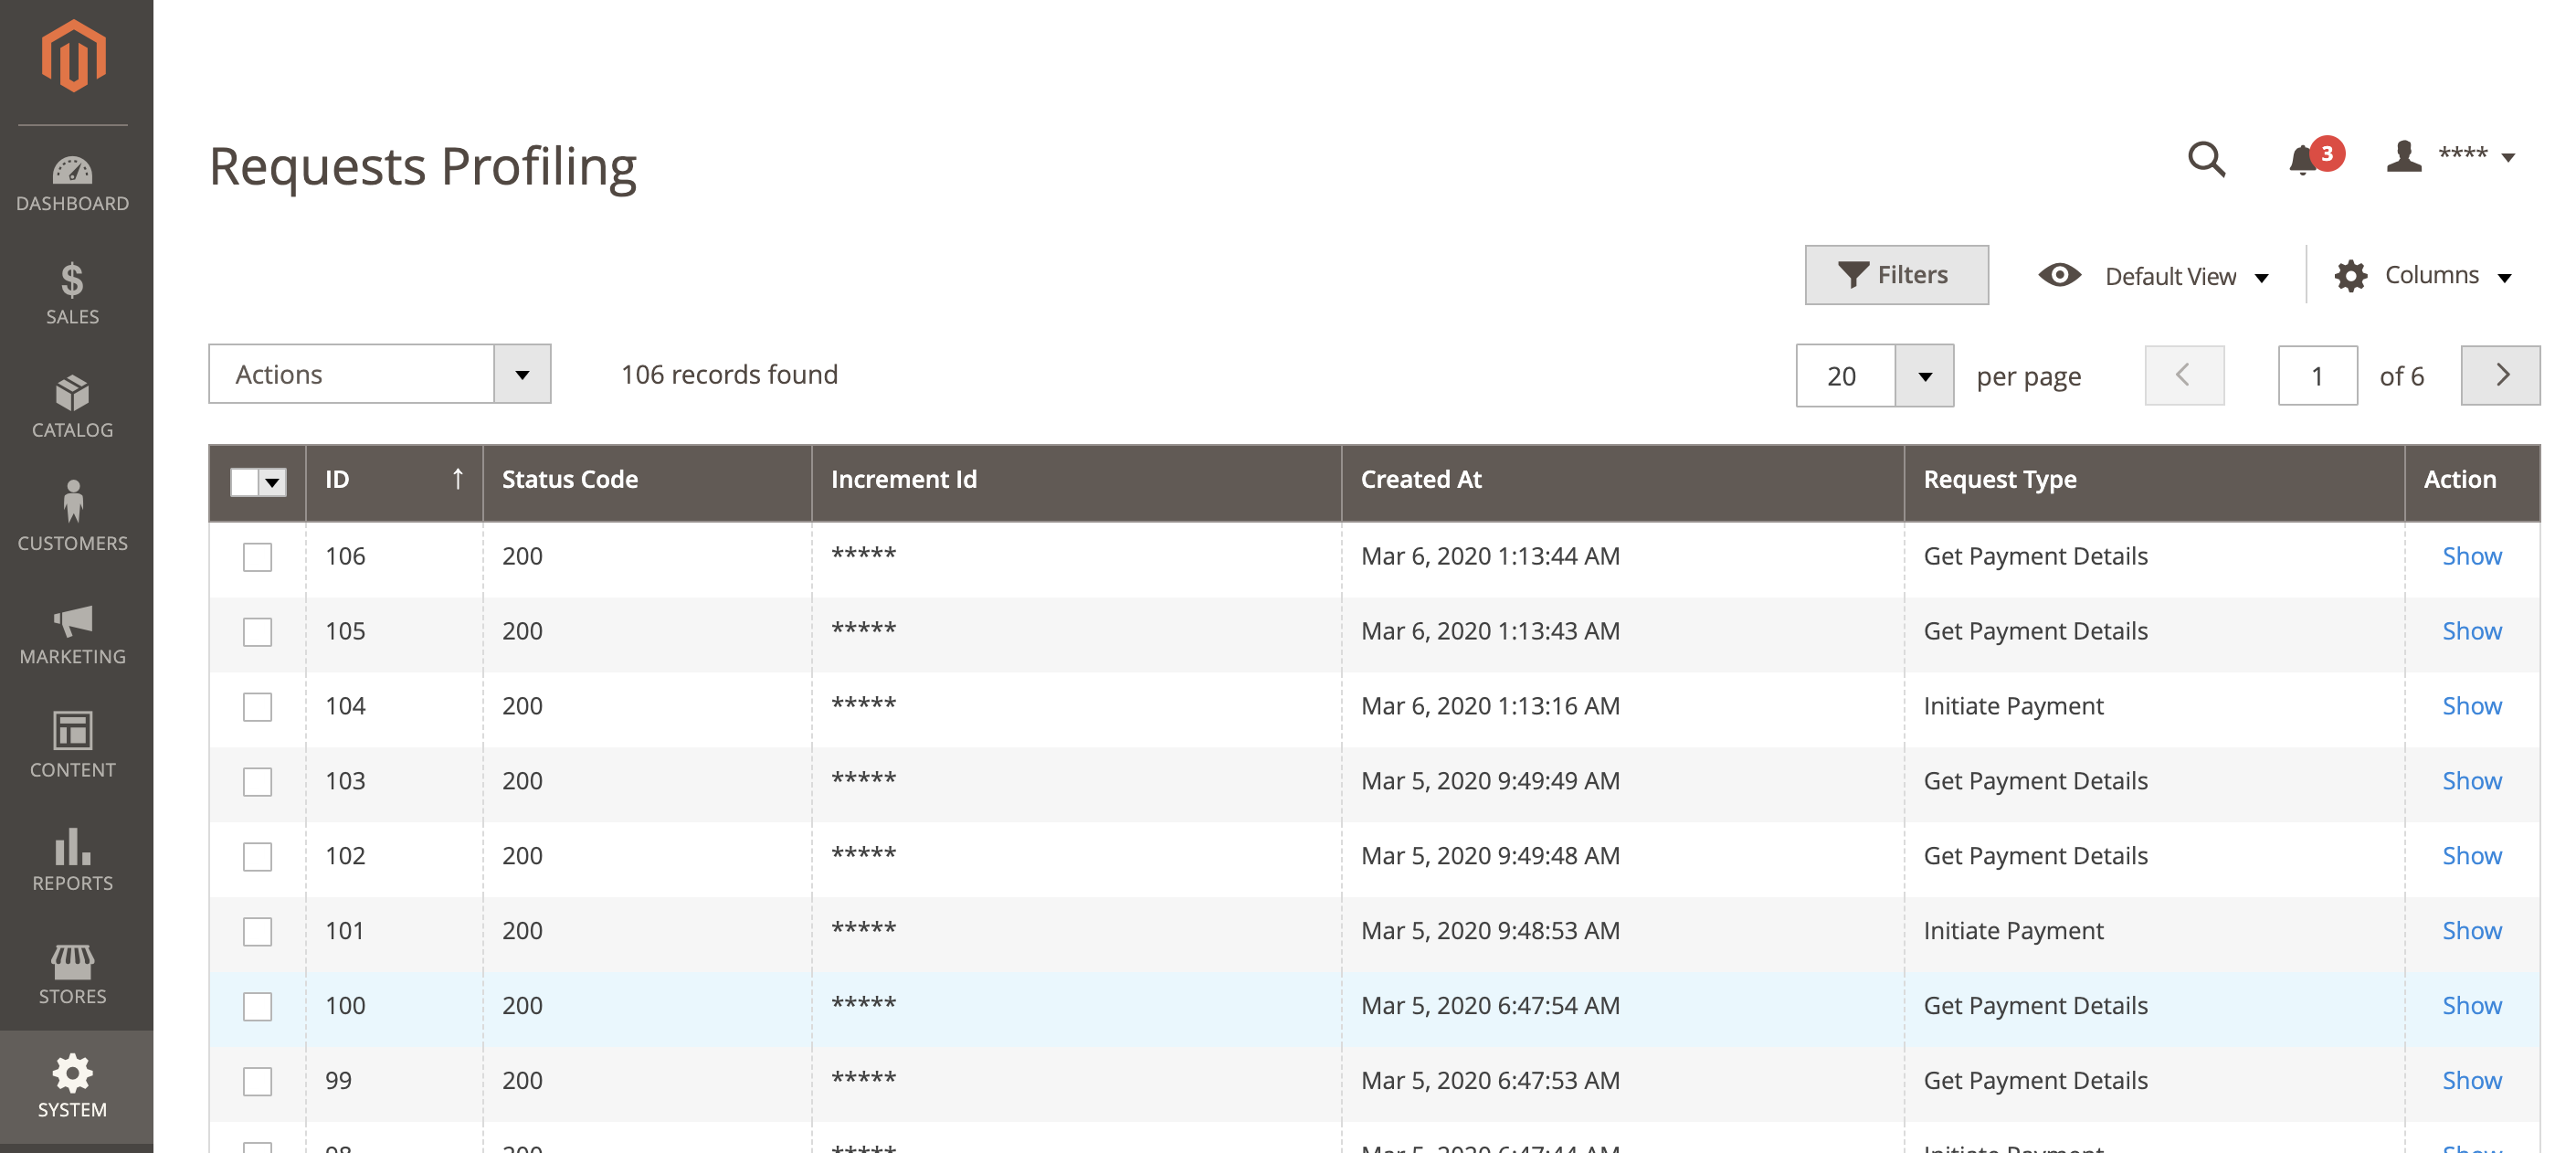
On the page, you can see the list of all requests for all orders that Adobe Commerce sends to Vipps MobilePay. By clicking on Show in the Action column of the grid, you can find the appropriate response from Vipps MobilePay.
By using the built-in Adobe Commerce grid filter, you can find all requests per order that you are interested in.
Tax calculation for Express
When enabling the Express payment in the configuration area, you may see a notification at the top of the Adobe Commerce admin panel such as:

This means that you should change Tax Calculation Settings to be based on Shipping Origin.
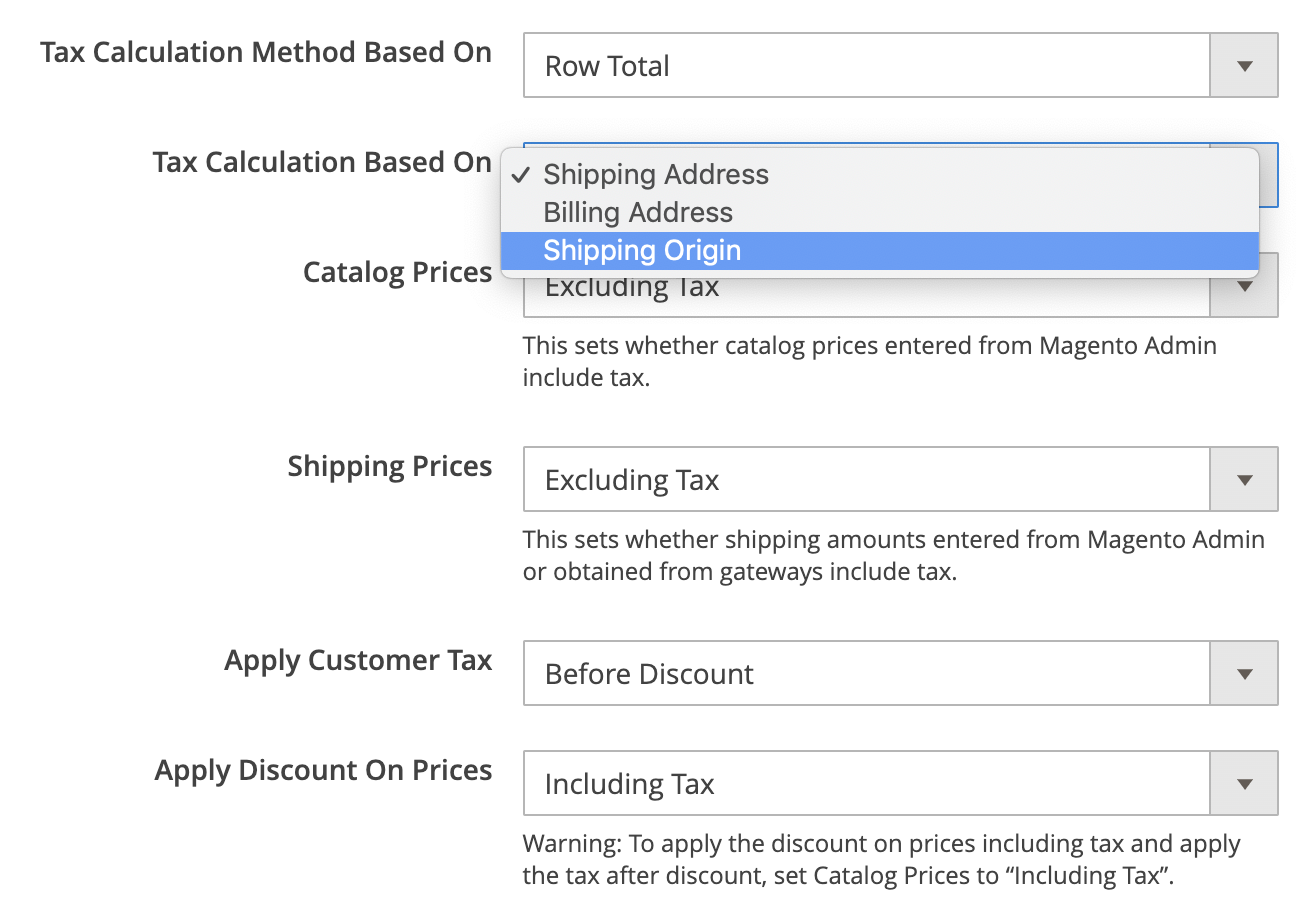
Otherwise, an issue with calculating delivery cost might occur.
Customization
The Adobe Commerce platform provides various ways to create custom flows that are difficult and unnecessary to describe in one page. Here, we provide a guide and references that can help you to understand the general idea of where to start.
For example, to customize the Order Success page, you can:
-
Use an existing 3rd party module or by doing the customization yourself. Visit Adobe Marketplace to see which 3rd party solutions are available.
-
Do the customization yourself. Refer to Adobe Commerce Frontend Developer Guide.
The following code is related to the Order Success page:
- Template:
magento/module-checkout/view/frontend/templates/success.phtml - Layout:
magento/module-checkout/view/frontend/layout/checkout_onepage_success.xml
- Template: