Electric vehicle charging
Customer scans a QR code at the charging station, approves payment in the Vipps MobilePay app, charges their vehicle, and pays only for the actual amount used.
![]()
Flow diagram: 6-step EV charging process. (1) Plug cable to turned-off car. (2) Scan QR code. (3) Reserve amount to start charging. (4) Stop charging on phone. (5) Unplug cable from car. (6) Receive receipt for charging in app.
- Customer scans QR code - Customer scans the QR code to access the payment page on their phone.
- Initiate payment request - Reserve an amount (e.g., 350-500 NOK) to cover the charging session.
- Customer approves payment - Customer authorizes the reserved amount in their app.
- Start charging - Charging begins once payment is approved.
- Capture payment - Capture the actual amount used after charging completes.
- Cancel remaining amount - Release the unused reserved amount.
- Add order details - Send order details with the final amount paid.
Here is an example flow:
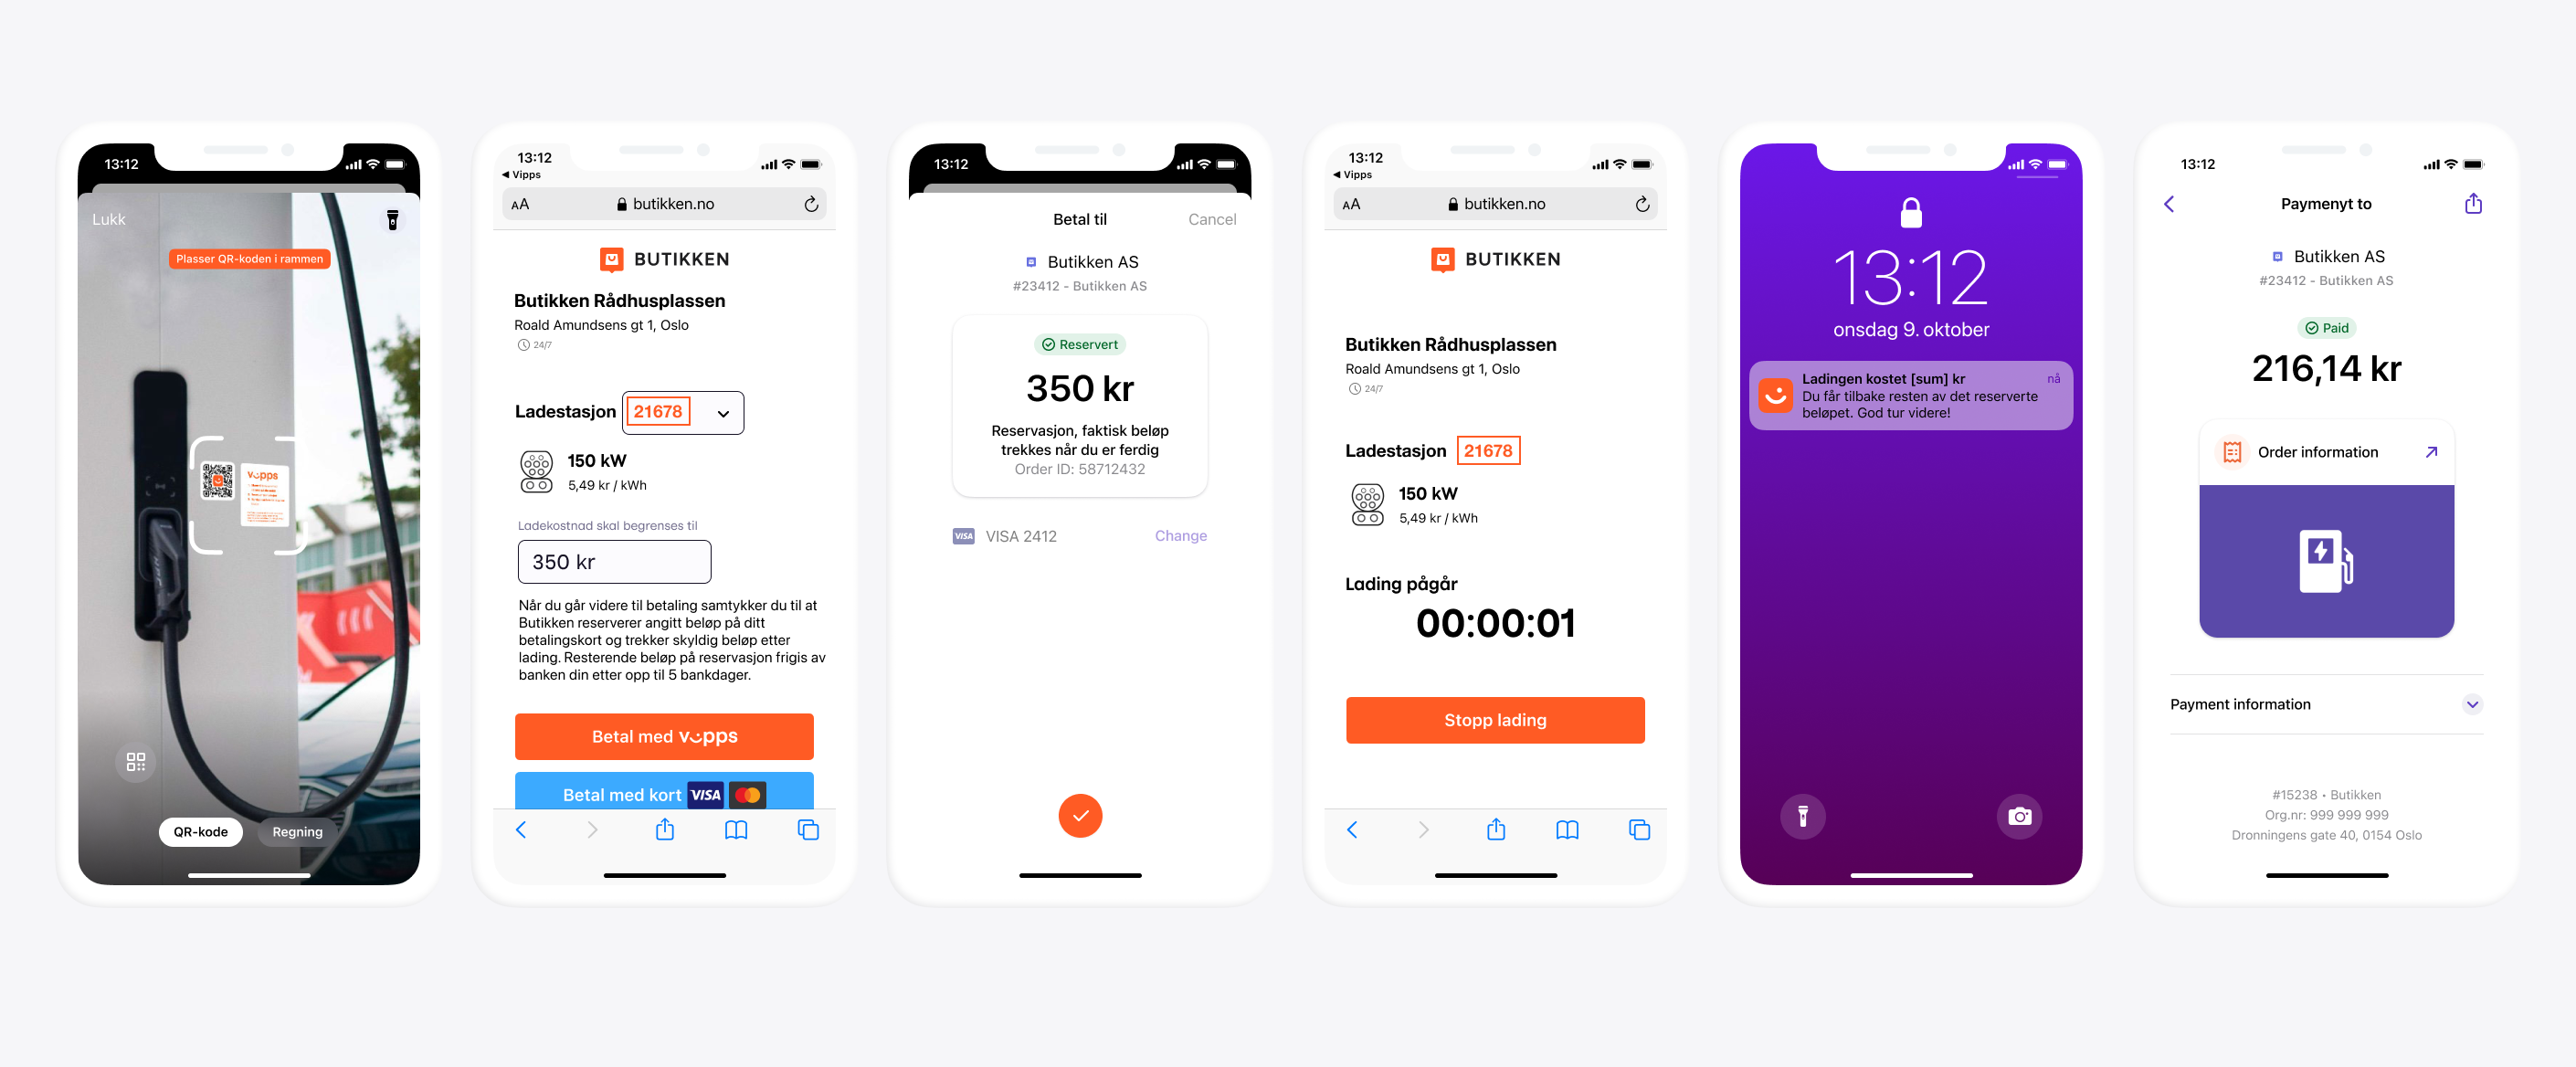
Five screenshots of the EV charging flow: (1) Charging station web page with QR scanner and payment options. (2) Reservation page showing a reserved amount with a "Pay with Vipps" button. (3) Charging in progress with a timer and a Stop charging button. (4) Push notification on lock screen indicating the charging amount. (5) App receipt showing the final amount paid.
View sequence diagram
Electric Vehicle charging flow
- Customer scans QR code to get to the payment page.
- Merchant initiates a payment request via the ePayment API.
- ePayment API requests payment from the customer.
- Customer clicks pay.
- Webhooks API sends the merchant a webhook with the payment authorization status.
- Merchant determines the amount due after charging is complete.
- Merchant sends the customer a push notification with the actual amount charged.
- Merchant captures the amount due via the ePayment API.
- Merchant cancels the remaining reserved amount (releases it) via the ePayment API.
- Merchant attaches order details showing the amount paid via the Order Management API.