In-store using merchant callback QR
Before implementing this flow, please see the recommended flows in-store payments flow and in-store payments with customer club.
In this flow, a user pays by scanning a QR with their Vipps  or MobilePay
  app.
The merchant gets their ID and sends a payment request to them through the app.
Optionally, the merchant can also get the phone number of the user and enroll them in their loyalty program.
app.
The merchant gets their ID and sends a payment request to them through the app.
Optionally, the merchant can also get the phone number of the user and enroll them in their loyalty program.
Prerequisites
Merchant callback QR: Generate a merchant callback QR code, as described in the QR API guide.
Webhooks: Set up webhooks to receive event notifications when the QR is scanned and when the payment is approved.
Details
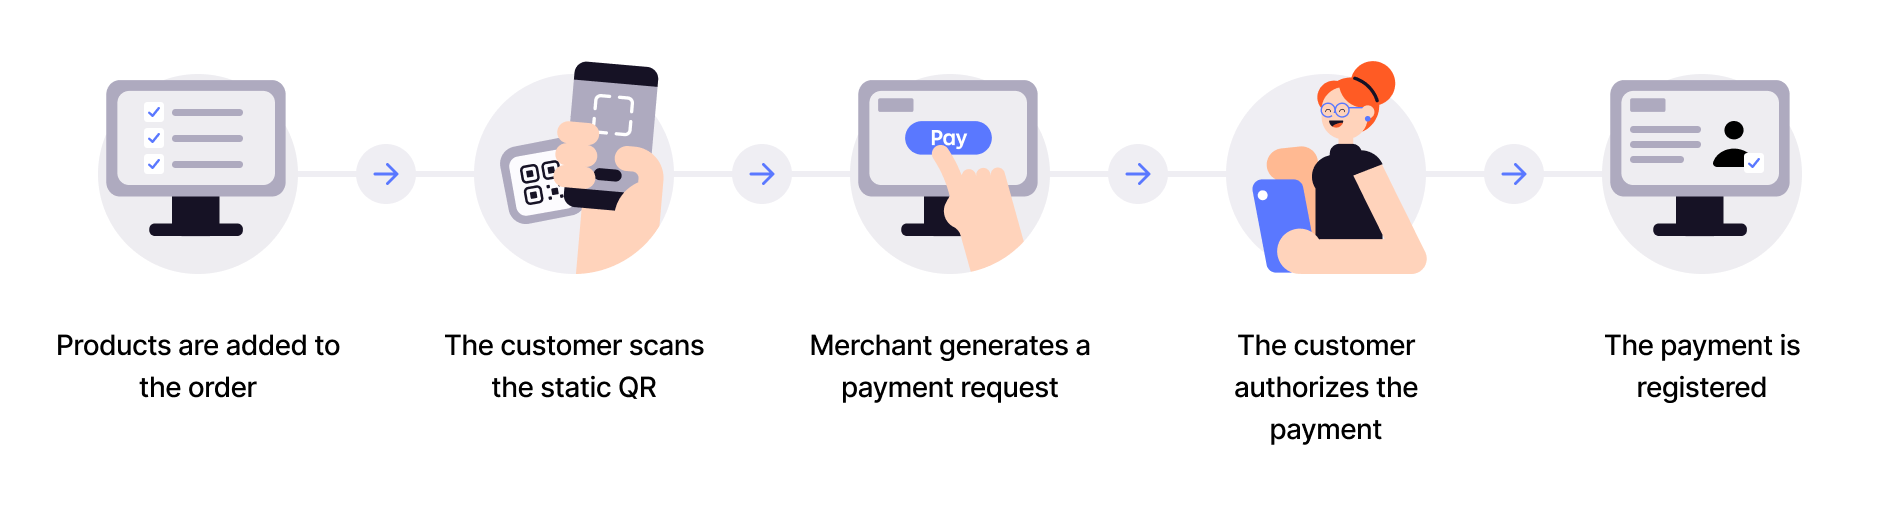
Step 1: The clerk enters the products into the cashier
The clerk enters the products and amount into the cashier with ePayment integration.
Step 2: The customer scans the QR
The customer scans the static QR on a sticker, and the Vipps/MobilePay app will wait until everything is ready and then show the amount and ask for customer confirmation.
Step 3: The merchant's system sends the payment request
Your system will receive a webhook notification that the customer has scanned the QR and is ready to pay with Vipps MobilePay. The notification will contain a token you can use to start a payment.
Use the token to send the customer a Create Payment request.
Detailed example of payment request
After getting your access token, send the API request for create payment.
Specify "userFlow": "PUSH_MESSAGE" to send the payment to the user's app.
Attach the order details simultaneously.
Per regulations, specify "customerInteraction": "CUSTOMER_PRESENT".
For example:
curl -X POST https://apitest.vipps.no/epayment/v1/payments \
-H "Content-Type: application/json" \
-H "Authorization: Bearer YOUR-ACCESS-TOKEN" \
-H "Ocp-Apim-Subscription-Key: YOUR-SUBSCRIPTION-KEY" \
-H "Merchant-Serial-Number: YOUR-MSN" \
-H 'Idempotency-Key: YOUR-IDEMPOTENCY-KEY' \
-H "Vipps-System-Name: acme" \
-H "Vipps-System-Version: 3.1.2" \
-H "Vipps-System-Plugin-Name: acme-webshop" \
-H "Vipps-System-Plugin-Version: 4.5.6" \
-d '{
  "amount": {
    "value": 10000,
    "currency": "NOK"
  },
  "paymentMethod": {
    "type": "WALLET"
  },
  "customer": {
    "customerToken": "insert customerToken here"
  },
  "receipt":{
    "orderLines": [
      {
        "name": "socks",
        "id": "line_item_1",
        "totalAmount": 10000,
        "totalAmountExcludingTax": 8000,
        "totalTaxAmount": 2000,
        "taxRate": 2500,
        "unitInfo": {
          "unitPrice": 4000,
          "quantity": "2",
          "quantityUnit": "PCS"
        },
      },
    ],
    "bottomLine": {
      "currency": "NOK",
      "posId": "pos_122",
      "receiptNumber": "0527013501"
    },
  },
  "reference": 2486791679658155992,
  "userFlow": "PUSH_MESSAGE",
  "returnUrl": "http://example.com/redirect?reference=2486791679658155992",
  "paymentDescription": "Purchase of socks"
}'
Step 4: The customer authorizes the payment
The payment request will appear in the customer's Vipps or MobilePay app, where they can select to pay or cancel.
Step 5: The merchant's system updates the status
Your system will receive a webhook notification regarding their choice. You can also poll for the status.
Once the payment is approved, update the status in your system. You may capture the payment immediately and provide a receipt.
Sequence diagram
Integration sequence for payments.
Payment-only flow
Complex flow
A more complex flow could involve getting access to the customer's phone number when they scan the QR code. This uses the Customer token exchange endpoint.
Once you have the phone number, you could check if the customer is a member of your loyalty program. If not, you can ask them to enroll. This uses the Login flow to gather consent from the customer.
The steps needed to get consent from the user are explained in detail there. The merchant initiated login flow will send a push to the user, and once the user has finished the flow, they will be ready to pay.
Sequence diagram for complete flow including phone number lookup, customer enrollment and payment is as follows.
Flow with lookup, enrollment, and payment
Next steps
See: