In-store using merchant callback QR
There is an issue that the test app requires you to go back to the home screen after scanning the QR. There, you will see the payment request when it is initiated. This is not an issue in production.
Before implementing this flow, please see the recommended in-store payments flow.
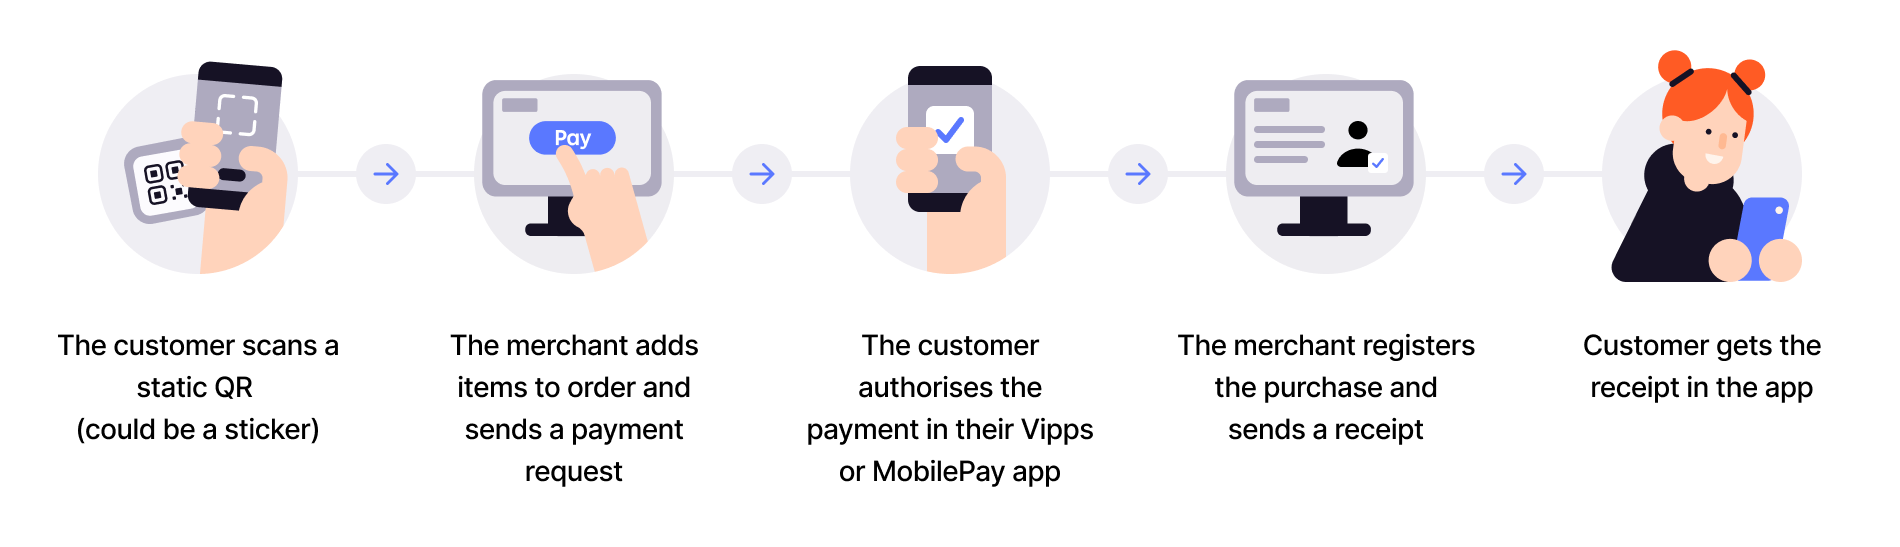
In this flow, a user pays by scanning a QR with their Vipps or MobilePay app. The merchant gets their ID and sends a payment request to them through the app.
Prerequisites
Merchant callback QR
Generate a merchant callback QR code.
How to create a merchant callback QR code
The QR code contains an ID that connects it to a specific POS or cash register in your store.
Here is an example HTTP PUT:
PUT:/qr/v1/merchant-callback/{merchantQrId}
{
  "locationDescription": "pos_2345",
  "category": "IN_STORE"
}
Details
Step 1: The customer scans the QR
When the customer scans the QR, your system will receive a notification that the customer is ready to pay with Vipps MobilePay. The notification will contain a token the merchant can use to start a payment.
Step 2: Send the payment request
Use the token to send the customer a Create Payment request.
Detailed example
Specify "userFlow": "PUSH_MESSAGE" to send the payment to the user's app.
You may attach the receipt at this time.
Specify "customerInteraction": "CUSTOMER_PRESENT".
Here is an example HTTP POST:
{
  "amount": {
    "value": 10000,
    "currency": "NOK"
  },
  "paymentMethod": {
    "type": "WALLET"
  },
  "customer": {
    "customerToken": "insert customerToken here"
  },
  "receipt":{
    "orderLines": [
      {
        "name": "socks",
        "id": "line_item_1",
        "totalAmount": 10000,
        "totalAmountExcludingTax": 8000,
        "totalTaxAmount": 2000,
        "taxPercentage": 25,
        "unitInfo": {
          "unitPrice": 4000,
          "quantity": "2",
          "quantityUnit": "PCS"
        },
      },
    ],
    "bottomLine": {
      "currency": "NOK",
      "posId": "pos_122",
      "receiptNumber": "0527013501"
    },
  },
  "reference": 2486791679658155992,
  "userFlow": "PUSH_MESSAGE",
  "returnUrl": "http://example.com/redirect?reference=2486791679658155992",
  "paymentDescription": "Purchase of socks"
}
Step 3: The customer authorizes the payment
The payment request will appear in the customer's Vipps or MobilePay app, where they can select to pay or cancel.
To get confirmation that payment was approved, monitor your webhooks.
What are webhooks?
When changes happen to your payment request, events are triggered (for example: Authorized, Terminated, Aborted, Cancelled, Expired, and many more).
You can register to receive these events, which is useful for programming an appropriate and quick response.
The webhook will send a message to your web server at the URL you specify.
See the Webhooks API guide for more details.
Once the payment is approved, update the status in your system.
Step 4: Capture the payment
Capture the payment and confirm that it was successful.
Detailed example
POST:/epayment/v1/payments/{reference}/capture
With body:
{
  "modificationAmount": {
    "value": 10000,
    "currency": "NOK"
  }
}
Sequence diagram
Sequence diagram for in-store using static QR.
Next steps
Review some related pages: